Adrian Jelley
Adrian Jelley
Technology Support Analyst, Dept. of Geography & Earth Sciences

Search my posts.

Latest News

  • Snowmaggedon 2014
  • The dawn of Fall, or the sunset of summer?
  • How to create panoramic photos using Adobe Photoshop
  • The future of email?
  • Shooting: Raw Vs. Jpg

What I talk about the most.

Bad Ideas baseball Birthday Campus Photos close-up Computer Labs create dslr Email JPG Long Exposure Macro Max panorama Personal Photography photos photoshop RAW Snow Social Media Time lapse UNCC Video

Photography

Posts related to photography

Snowmaggedon 2014

January 30, 2014 by Adrian Jelley
Categories: News

Ok, not really, but it was nice to have yesterday off.

On Tuesday, when the weather forecast was calling for the snow to start around lunch (which later changed to 2pm, then 5pm) I turned on my camera’s intervalometer and captured a time lapse from roughly 12:30pm to 5pm. I’m attaching a video link (via youtube) below.

The camera was set to take a still image every 30 seconds, and the music was composed personally by me (via Apple Loops and Garageband).

Enjoy.
SnowLapse 2014

Tags: PhotographySnowTime lapseVideo

The dawn of Fall, or the sunset of summer?

August 14, 2013 by Adrian Jelley
Categories: NewsUpdates

So it’s August 14th, Students will be back on campus in a couple of days, and classes resume sometime next week. In short, its the beginning of another academic year. So welcome, or welcome back. I hope the Fall semester and the 2013-2014 academic year treat you well.

So what have I been doing all summer other than neglecting this blog?

Read more…

Tags: Computer LabsPhotographyTime lapseVideo

Shooting: Raw Vs. Jpg

October 12, 2012 by Adrian Jelley
Categories: News

If you spend any amount of time reading digital photography forums, you are bound to come across an an article (or 10) about which output mode is better, Raw or Jpg. Now if you are new to digital photography, or all you have is a camera phone or small point and shoot camera you shouldn’t worry about these articles, as they probably don’t apply to you.

So what exactly is Raw and Jpg? The short answer is Raw and Jpg are how your camera stores and processes the pictures it takes. Read more…

Tags: JPGPhotographyRAW

Close-Up Vs. Macro

October 04, 2012 by Adrian Jelley
Categories: News

So I recently came across an online discussion about Close-Up photography versus Macro photography. The discussion took place within a Facebook group and there was a lot of interesting comments. The thing that surprised me the most was how much people inter-changed the two terms, essentially likening them to mean the same thing. But are they?

If you look up the terms on wikipedia you will get the definitions:

Close-Up: In filmmaking, television production, still photography and the comic strip medium a close-up tightly frames a person or an object. Close-ups are one of the standard shots used regularly with medium shots and long shots (cinematic techniques). Close-ups display the most detail, but they do not include the broader scene. (http://en.wikipedia.org/wiki/Close-up)

Macro: Macro photography (or photomacrography[1] or macrography,[2] and sometimes macrophotography[3]) is extreme close-up photography, usually of very small subjects, in which the size of the subject in the photograph is greater than life size (though macrophotography technically refers to the art of making very large photographs).[2][4] By some definitions, a macro photograph is one in which the size of the subject on the negative or image sensor is life size or greater. (http://en.wikipedia.org/wiki/Macro_photography)

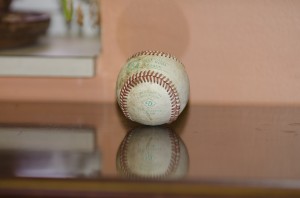
So one is an “extreme” form of the other. But what exactly does that mean? To demonstrate I took a few photos of a baseball I had laying around my office.

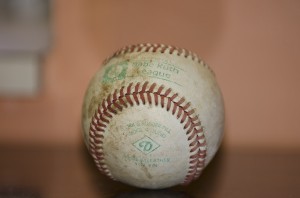
Shot at 100mm on a “normal” zoom lens. The camera was roughly 50 inches away from the baseball.

The shot to the left was a “close-up” of sorts. In order to focus I had to position the camera fairly far away (~50″) and zoom in. I only zoomed into 100mm since that is the focal length of my macro lens, and I wanted to show the difference between 100mm on the two lenses.


Shot at 200mm on a “normal” zoom lens. The camera was roughly 50 inches away from the baseball.

Now to get more of a “close-up” of the baseball, I went ahead and zoomed in all the way on my lens, which happens to be 200mm. This would fit better with the standard definition of “close-up” as it is a tighter frame and you can only really make out the baseball.


And now for the Macro…

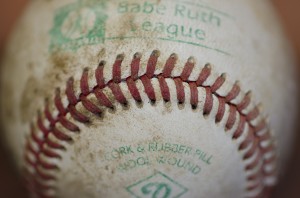
Macro, shot at 100mm with the camera roughly 12 inches away from the baseball.

This was shot on my 100mm macro lens, roughly 12 inches away from the baseball. The macro lens has a 1:1 reproduction ratio which means that the baseball in this picture would appear to be the same size as if you held it up to your face (roughly 12 inches away like the lens was)  and looked at it.


Now I admit, the baseball probably wasn’t the best subject to use for this post because it is a decent size, and with some “normal” camera lenses you could get much closer to it than I did on with my zoom lens. But I wanted to use the 100mm focal length since that is the fixed length of my macro lens, and the only other lens that can reach 100mm is my zoom. So I needed a subject that was relatively easy to focus on with both lenses.

With enough practice you can shoot close-ups of most things, then with editing software you can crop in fairly tight on the subject to give it the appearance of a macro shot. However, the tighter the crop (or the smaller the subject is relative to the frame) you run the risk of getting a pixelated image, especially if you enlarge the photo. So if you plan on taking pictures of very little things, like bugs and blooms, it may be worth the money to purchase a macro lens.

But my point and shoot camera has a macro setting, can I use that? The short answer, is yes*. But with some stipulations (otherwise know as *). Most point and shoot cameras, and some DSLRs will have a macro mode. For the most part these modes won’t let you get closer to your subject, but instead the camera will do its best at blurring the background of the shot, to give it a macro feel which in some cases will be exactly the look you are going for so if you have the macro mode, don’t hesitate to try it out.

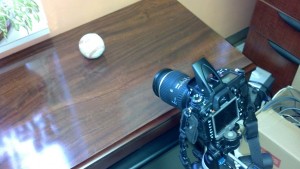
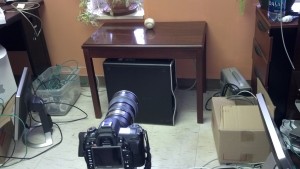
Here’s a couple of shots of the set up I used, one with the macro lens the other with the zoom.

100mm macro lens, roughly 12 inches away from the baseball.

My 70-200mm zoom lens, roughly 50 inches away from the baseball. (please ignore the mess that is my office.)

Tags: baseballclose-updslrMacroPhotography

This was a bad idea.

September 27, 2012 by Adrian Jelley
Categories: NewsUpdates
Photo Filter Stack

4 stacked filters. Neutral Density (-0.3), Circular Polarizer, Drop In UV and Drop In Split ND

But what is it exactly?

What you are looking at is a “stack” of four different camera lens filters attached to a AF-S Nikkor 18-70mm 1:3.5-4.5G ED lens. That I was attempting to use to get some long exposure shots of campus. But that isn’t important right now.

Since this is a new blog, let me give you the backstory as to why I was trying this ridiculous concept of stacking filters. My official job title is Technology Support Analyst. I’m housed within the Department of Geography and Earth Sciences but I report to the Office of Academic Technology (OAT). Recently I have been asked to help develop the CLAS image repository for use on college websites. Initially that meant taking panoramic pictures of CLAS buildings and computer labs but has since morphed into more “generic” photos of campus (generic meaning, non-panoramic in this case). So when I get some downtime from my technical support role, I very often wander campus with my camera and tripod looking for interesting things and places to shoot from.

Now, back to the bad idea. After a brief meeting this week I decided that I could take some long exposure panoramic pictures around campus in the middle of the day. Now if you are not familiar with the phrase “long exposure” and how it relates to photography I’ll explain. Typically when you take a photo with your camera, the shutter, which lets light pass through the lens into the digital sensor, stays open very briefly, usually in the range of one-two hundred and fiftieth of a second (1/250) but this number can vary greatly depending on the conditions. Now when someone speaks of taking a long exposure they are usually referring to the shutter on their camera staying open for one second or longer. Also when someone refers to a long exposure it’s a safe bet to assume they are taking a photo when there isn’t a lot of light available. So you can guess that attempting to shoot a long exposure photo in the middle of day might not result in the best result, and you would be right (at least with today’s set up).

In order to overcome the brightness of the sun at approximately 1pm I decided that I could attach every filter I owned onto my camera lens at one time. So I did exactly that. Now I do own a Neutral-Density(ND) filter, which acts like sunglasses for your camera lens it blocks some of the light making things seem darker. The neutral density filter I own is rated at -0.3 which means its 1/3 of a stop darker when its attached to the lens. (I’ll try to remember to explain what “stops” are in a different post) After the ND filter I attached a step-up ring and a circular polarizing filter (the step-up ring is just an adapter that lets you use larger filters on a lens, in this case my lens is 67mm in diameter and my circular polarizer is 77mm in diameter). And finally I attached the drop-in filter system I own (drop in filters are usually rectangle and do not contain any threads) and attached the Ultra Violet (UV) filter and the Split ND filter (this is a graduated filter where the bottom half is clear and the top half is a ND filter that are blended together).  Finally, I decided to set the apature of the lens to f11 (as with the “stops” I’ll try to go into apature in a later post).

When it was all said and done, I was not able to get the long exposure shots I was hoping for, and combine that with attempting to make panoramas out of the attempted long exposure shots I failed miserably. So instead of just trashing the shots and starting over another day I decided to play around in PhotoShop and create some funky images out of the results. I’ve posted the crazy images to my “Campus Images” photo folder on my Google+ account so you can find them there. If I’m not in your circles on G+ or you aren’t a member, you can see the album here: http://goo.gl/FPoiY

So can shooting long exposures in the middle of the day work? The short answer is yes. The long answer is yeesssssss!  In order to shoot a long exposure in the middle of the day you will need a strong ND filter, probably in the range of -3 (3 stops) to -5 (5 stops) and set the apature of the camera to f22 or higher. Also, shooting on a cloudy day would probably work out better as well.

Finally, I just wanted to say thanks for reading to the end of this post. I realize that I probably got a little long winded. And as I mentioned in the post, I’ll try to go into more detail about stops, apature, shutter speed, and why do you want to (and how to) shoot long exposures in later posts.


Tags: Bad IdeasCampus PhotosLong ExposurePhotographyUNCC
 

Loading Comments...
 

You must be logged in to post a comment.

    Skip to toolbar
    • Log In